Showing posts with label recipe. Show all posts

Friday, 8 August 2014

The best breakfast

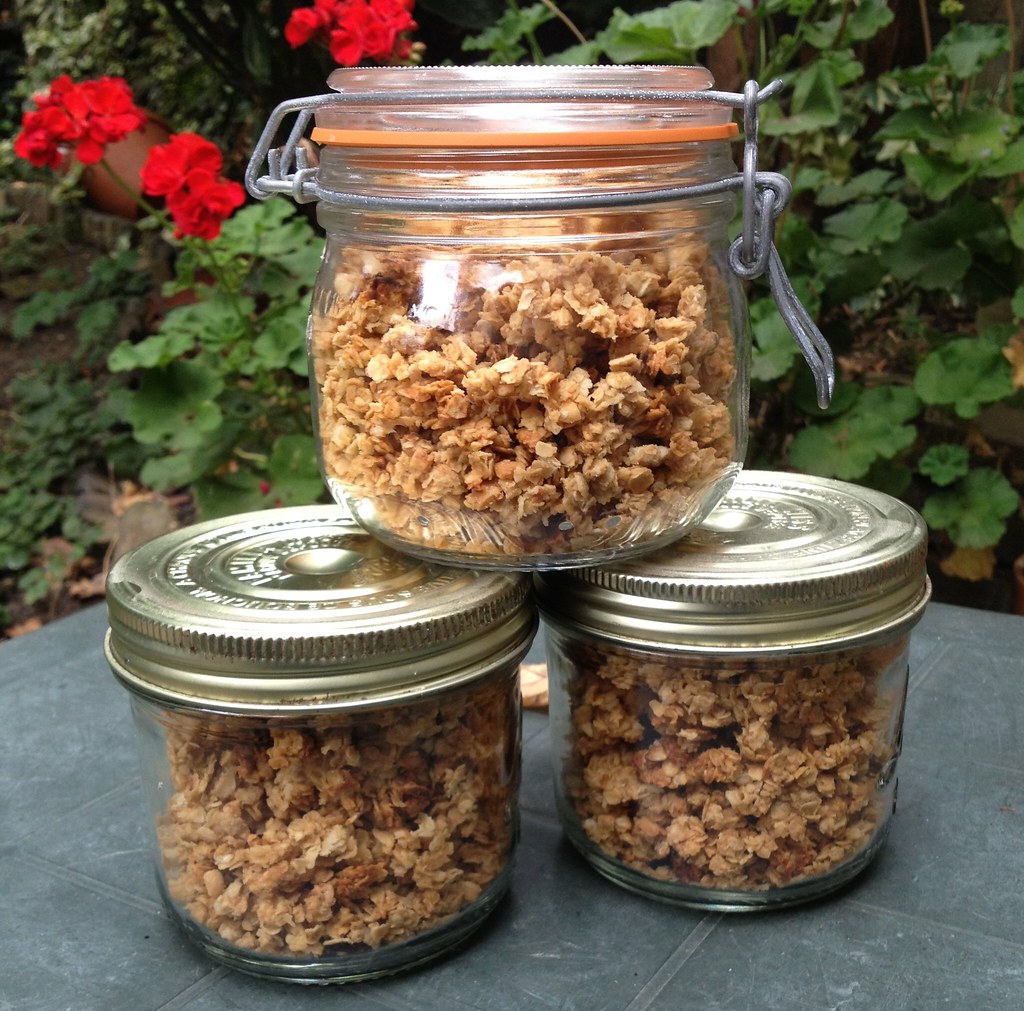
I finally found a granola recipe that is quick and easy to make - no tedious removing from the oven to stir every five minutes - and which doesn't require me to hand over my entire month's food budget to Holland and Barrett in order to buy ingredients: this recipe - from the brilliant Jack Monroe.  
  • The recipe uses ingredients that I always have in the house: oats, peanut butter, honey and a little pat of butter.  That's it.
  • It took me about 2 minutes to mix and then just 15 minutes to cook.
  • It made the whole house smell amazing while it baked.
  • Cam did a quality control test once it was cooled, and I had to physically remove the spoon from his hand in order to stop him from eating the WHOLE BATCH.

Untitled
Granola jars
 
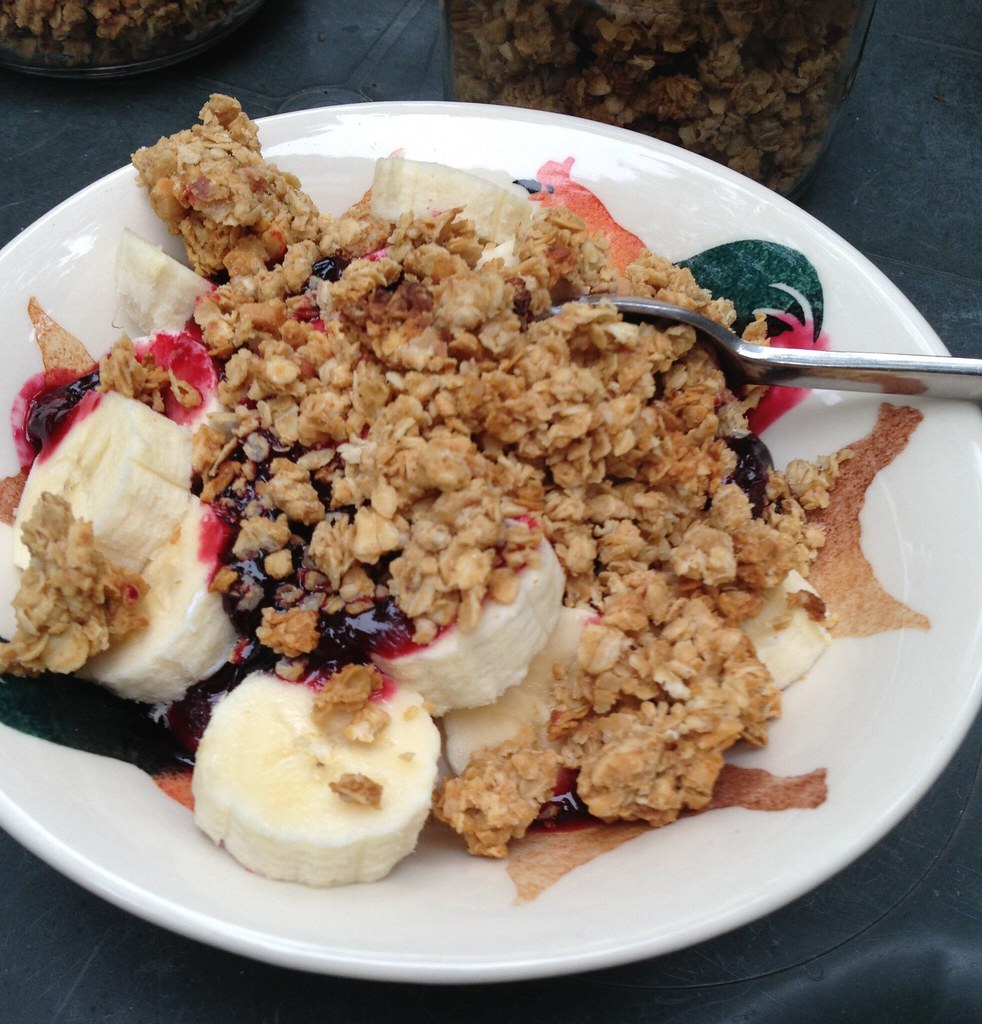
I had some for breakfast this morning with yogurt, banana and fridge jam.  It was one of the nicest breakfasts I've had in months.

Untitled
A very fine breakfast

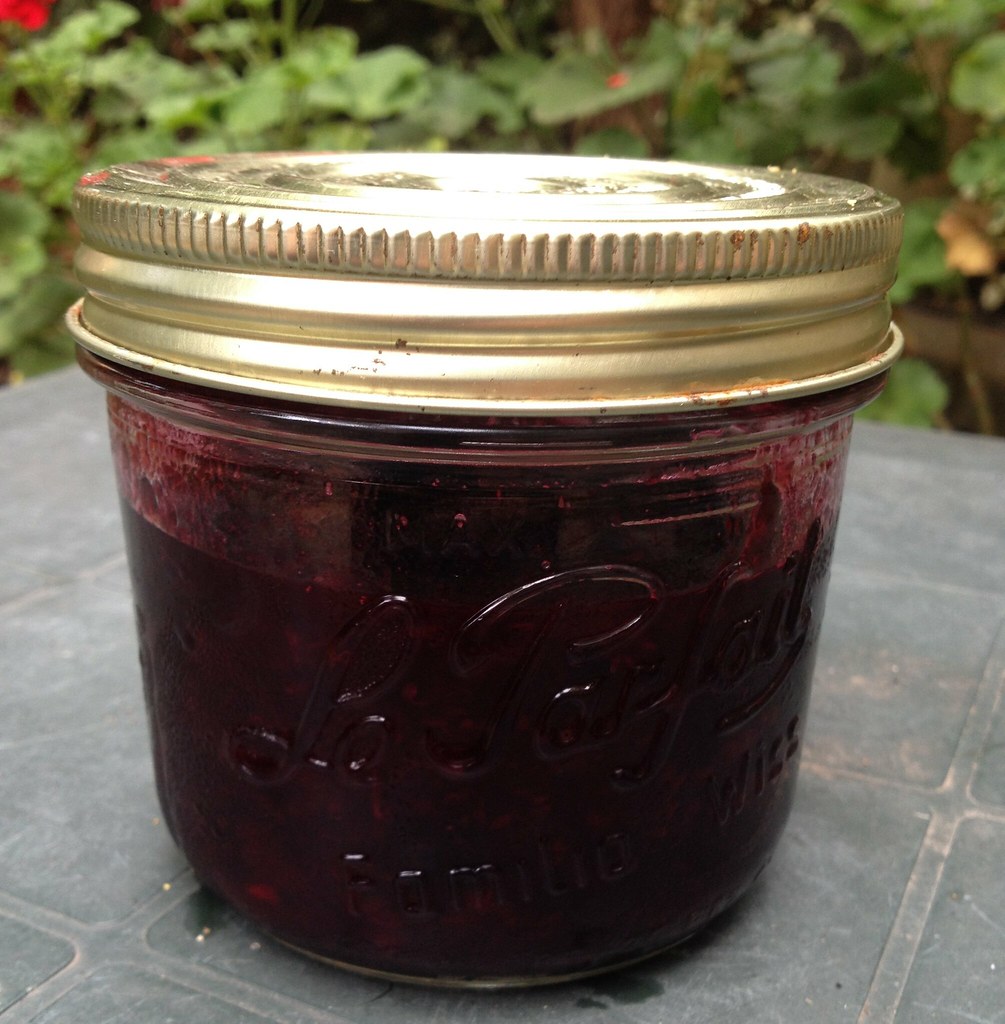
The fridge jam is a cross between a sauce and a jam.  It needs to be kept in the fridge, and is a lovely thing to have on hand as the basis for a fruity breakfast, a smoothie or a pudding.  This one is made from half a punnet of blackcurrants - left over from an enthusiastic session at the PYO farm last week - a few shakes of caster sugar, and two tablespoons of water.  I put everything in a pan, brought it to the boil, and left it to bubble for a few minutes before cooling and putting it in a clean jar. 

Untitled
Blackcurrant fridge jam


It is nice and sharp, and a wonderful colour.  You can make this from any fruit, but berries and stone fruits work particularly well.  The key to making fridge jam is just to use a very small spoonful or two of water in your mixture.  Proper jam uses much more sugar and no water; stewed fruit (or fruit compote) uses less sugar but more water - fridge jam falls somewhere in the middle.  

I love blackcurrants so much - such an interesting, feisty fruit.  This jar of them tastes  like distilled summer.      

Monday, 1 October 2012

Lecture mix

I didn't expect that being a student nurse would make me so hungry.  I spend the entire time at on campus with a growling stomach, wondering when it's next time to eat.  And it's not just me -  my new friends are all the same.  Being a student nurse gives you a huge appetite, it seems.

Many of our lectures, practicals and tutorials run back to back with no break.  Often they are scheduled over lunchtime too.  The hunt is on for snacks that we can eat discretely in lectures, and food that we can shovel into our mouths with no mess or fuss as we dash through the building to the labs.  This is our list of snacks we've tried and rejected so far:
  • crisps - too noisy, and not healthy if you eat them all the time
  • apples - too noisy, and where do you put the soggy core?
  • bananas - too stinky, and where do you put the skin?
  • croissant - crumbs all over your notebook and the notebook of anyone sitting within three seats of you
  • cake - too sticky
Then this weekend inspiration struck.  I made a big batch of trail mix for Olivia's lunchbox, and realised that it would work perfectly as a lecture mix too.

Trail mix is a combination of seeds, nuts, dried fruit and chocolate that is designed to fuel you on long distance walks (or trails, hence the name).  Those delicious boxes from Graze are basically trail mix.  Of course the beauty of it is that you custom your mix to what you have in your kitchen and what you like to eat - I also have to leave nuts out of anything I make for Olivia's lunchbox because her school has a strict no nuts policy.

The batch I made at the weekend had in it:
  • pumpkin seeds
  • sunflower seeds
  • sultanas
  • dried apricots, chopped to the size of the sultanas
  • mini marshmallows
I make enough to fill a large 1 litre jar, and whoever wants some can shake a few handfuls into a little pot.

Other good things I like to put in my trail mix if I have them are:
  • chocolate buttons or chocolate chips
  • dried banana chips
  • dried figs
  • dried cranberries
  • salted peanuts
  • cashew nuts
  • bombay mix
  • dried, sour cherries
  • rice krispies
Trail mix - for lectures at lunchtime
 
Let's see if this will get me through three hours of back to back biology and anatomy lectures without my stomach growling.

Monday, 3 September 2012

Tastes of the moment

Good things to eat at the moment:
  • Strangely shaped tomatoes from the garden - finally ripening.
  • Garden tomatoes
  • My brother-in-law's strawberry salad: spinach and rocket leaves tossed with strawberries cut into quarters, cashew nuts roasted with black pepper and maple syrup, and a light vinaigrette. Completely delicious.
  • A freshly baked loaf of wholemeal bread.
  • Wholemeal loaf
  • Marquess Grey tea, from Waitrose.
  • A teenage boy friendly supper - one that has large portions and is full of both meat and carbs.  Tonight it was chicken, bacon and peas, with orzo pasta, a splash of chicken stock and a dollop of creme fraiche.
  • Chicken, bacon & peas with orzo
  • The last few squares of a bar of my favourite Green and Blacks chocolate, after dealing with just one too many enormous spiders today.  The best sort of comfort food.

Saturday, 5 May 2012

Madeleines for everyone

Silicone Madeleine bun tins

I have some silicone madeleine tins, which are among my favourite pieces of kitchen kit.  The sweet shell shape of madeleines, and their perfect one mouthful size (or two mouthfuls if you are being super polite) is appealing to everyone.  The silicone means that you don't need to use any cake-release or grease on the tins, and the madeleines just pop out perfectly every time.

Today I made some savoury madeleines, and then Cam made some sweet ones.  The process of making madeleines is so quick and easy, that it can become slightly addictive.  Almost as addictive as eating them.

My savoury ones were adapted from a recipe in the lastest issue of Marie Claire Idées, and are made from goats cheese and thyme.

A dish of goats cheese & thyme madeleines

Goats Cheese and Thyme Madeleines
Makes 15.
  • 30g butter, softened
  • 1 tablespoon olive oil
  • 2 eggs
  • Half a small goats cheese  - approx. 50g, but no need to be particularly accurate here.
  • 50g plain flour
  • 1/4 teaspoon baking powder
  • 1 tablespoon chopped, fresh thyme
  • a big pinch of ground black pepper
In a large bowl, mash together the softened butter and olive oil with a fork.  Add the eggs and beat vigorously until slightly frothy.  Then stir in the remaining ingredients and mix gently until combined.

Spoon the mixture into madeleine tins and bake at Gas 6 for fifteen minutes, but start checking after 10.  Nothing dreadful will happen to the madeleines if you open the oven door and inspect them a few times.  They are ready when they are firm to the touch and lightly golden around the edges.  Remove from the tins and allow to cool on a rack.

Savoury madeleines

We'll be having these as nibbles this evening with some slices of saucisson and a glass of white wine.  We brought several saucissons back from France, and they are currently hanging from my saucepan rack, giving a nice garlicky aroma to the kitchen.

Saucisson and garlic, hanging up with the pans
Saucissons and garlic, hanging with the pans in my kitchen

These savoury madeleines can be made with garlicky boursin, instead of goats cheese.  As you can see, I also have a string of French garlic hanging up with my saucissons - we are all big fans of garlic here as well.

Once Cam realised I had the madeleine tins out, he wanted to get in on the act too.  He had a recipe for Nutella madeleines which he wanted to try.  They are as divine as they sound.

Nutella madeleines

Nutella Madeleines
Makes 36.
  • 150g plain flour
  • 1 teaspoon baking powder
  • 125g butter, softened
  • 150g caster sugar
  • 2 eggs
  • 2 tablespoons of milk
  • 1 large, heaped tablespoon of Nutella, plus extra for dolloping.

Beat together the eggs and sugar until pale and slightly frothy.  Add the remaining ingredients and mix gently but thoroughly.  Spoon the mixture into the madeleine tins - unless you have loads of tins, you will probably have to do this in two batches.  Finally, add small dollops (roughly half a teaspoon) of nutella to each madeleine.

Bake at Gas 6 for 15 minutes, then check to see if they are firm to the touch and lightly browned.  If not return to the oven for another 5 minutes or so.  Remove from the tins and allow to cool on a rack.

~~~~~~~~~~

My silicone madeleine tins were a birthday present from my Mum, and she bought them from her local supermarket in France.  However, if you don't have a French supermarket handy you can also buy them from Amazon.  Lakeland sell non-stick ones, which get great reviews, but I personally think silicone is even better than non-stick for madeleines, because you can pop them out so easily.

Cam's recipe came from this wonderful French recipe book I bought for him this Easter.

Cam's Nutella cookbook

Nigella has a recipe for rosewater madeleines in her Domestic Goddess book, which is delicious too.  However, in general, I find that few English recipe books have madeleine recipes - I still think of them as particularly French delicacies, despite being able to buy the tins in Britain.

The Cook the Perfect series on Radio 4's Woman's Hour, had a feature on, and a recipe for, madeleines which you can read about and listen to here.  However, I do think that the chef in this episode makes them sound far too complicated - I don't rest the batter for an hour, nor do I use beurre noisette - they're almost foolproof in my experience, and part of their charm lies in the fact that you can whip up a batch from start to finish in less than half an hour.

Sweet and savoury madeleines
Savoury and sweet - perfect with a chilled white wine, or a nice cup of tea
Happy times!

Thursday, 2 February 2012

Crunch

I do love coleslaw - but I only realised this a few years ago, after making it myself for the first time.  Shop-bought coleslaw is not to my taste at all: sickly mayonnaise, raw onion and tasteless carrots are the things I complain about most.  But homemade coleslaw is a whole other thing entirely.  Crunchy, fresh, light, full of flavour - it's an energising, satisfying thing to eat - not a weird, creamy garnish to be pushed to the side of your plate.

The key to a coleslaw which I will enjoy eating lies in the dressing.  I knew I didn't want plain mayonnaise, so I experimented with various other dressings - some with mayonnaise and some without.  I eventually settled on a blend of yogurt and mayonnaise, sharpened with cider vinegar and spiced up with a great deal of black pepper.

I love mayonnaise made by the French brand, Maille.  I particularly like this one, flavoured with a subtle hint of mustard.  I bring back several jars of it whenever I go to France, but they sell it in Waitrose too.

My favourite mayonnaise

I don't like raw onion in coleslaw either - its flavour overwhelms everything else.  A finely sliced spring onion can be a nice addition, although is not essential.  The two key ingredients you need are cabbage and carrots.  I like coleslaw made with any cabbage - red, green or white are all good, although red cabbage does tend to bleed its colour a little and make the coleslaw a pale shade of pinky-purple.  This is not really a bad thing, mind you. 

Cabbages for coleslaw

In its simplest form the coleslaw I make is a quarter of a cabbage, sliced very finely, two fat carrots, peeled and grated, and a spoonful of dressing.  This can be put together for supper or lunch at very short notice - I usually have all the ingredients I need in my fridge.

But coleslaw can be fancified too.  Today I made a cheese and grape version, which was wildly successful.

The List Writer's Crunchy Cheese & Grape Coleslaw

For enough to feed a family of four, you will need:
  • a quarter of a large green cabbage, cored and finely sliced
  • 2 fat carrots, peeled and coarsely grated
  • 50g mature cheddar cheese, coarsely grated
  • a small bunch of seedless green grapes, sliced into quarters
  • dressing to taste
For the dressing, mix together in a little bowl:
  • 1 tablespoon of good mayonnaise
  • 2 tablespoons of natural yogurt
  • 1/2 a tablespoon of cider vinegar
  • lots of freshly ground black pepper
Put all the coleslaw ingredients together in a large bowl and mix together with the dressing  - a spoonful at a time until it looks right to you.  Use your judgement here - you may like your coleslaw more or less creamy than I do.  Any leftover dressing, or coleslaw, will keep in the fridge for several days.

Coleslaw dressing


Good things to add to simple coleslaw (in place of the grated cheese and grapes above):

  • cheddar cheese and diced apple (I find if you grate the apple into the coleslaw the whole thing becomes watery and sour - dicing the apple is a much better idea)
  • toasted sunflower seeds and sultanas
  • sliced radishes and chopped roasted peanuts
  • chopped walnuts (serve this walnut coleslaw with sourdough bread and slices of parma ham - completely delicious)
  • a finely sliced spring onion
We eat our coleslaw with all sorts of things:
  • cheese on toast
  • jacket potatoes
  • sandwiches
  • peppery cumberland sausages
  • a good pork pie from the local butcher
And once every few weeks, when I am feeling in need of a little lunchtime indulgence, I walk up the road to our local Pakistani cafe, buy one of their VERY spicy lamb samosas, and come home and eat it with a big pile of cooling, homemade coleslaw on the side.  It's a crunchy, spicy, flavoursome feast fit for a queen (or king).

Coleslaw

Wednesday, 18 January 2012

10 things

Big bag of kumquats

  • I have a big bag of kumquats and no idea what to do with them.  We tried eating them raw but they are horrid.
  • I don't like making or eating marmalade at the best of times, and I think making it with teeny, tiny kumquats might send me over the edge.
  • Check out this recipe.  The writer de-piths and de-seeds the kumquats before turning them into marmalade.  Once I'd seen how tiny the kumquats were, and how many of the little blighters there were in my bag, this task seemed truly epic and way beyond my levels of patience or enthusiasm.
  • A friend suggested turning them into a compote, with almonds, which sounded nice.  And simpler.
  • But kumquat compote (try saying that quickly) sounds to me like marmalade in disguise.
  • Another friend suggested adding them to vodka.
  • But I don't really like vodka either.
  • The BBC Good Food website - my failsafe recipe search engine - has just three recipes involving kumquats.  One of which uses a single kumquat as a garnish.
  • I was wondering if the hens would eat up the kumquats for me.  But I suspect not.
  • Any other suggestions of what to do with them would be VERY gratefully received.


Kumquats

Friday, 18 November 2011

Good things in the kitchen

Good things have been happening in our kitchen lately.  Good, sticky, smoky, golden-coloured, slow-cooked, autumnal things. 

Cam's glorious and delicious cheese & onion bread

I find this time of year inspires me to cook more - my pottering-gently-around-the-kitchen-listening-to-Radio 4 approach to cooking suits stews, bread, roasts and cakes, which are what you want to eat at this time of year.  The children have been getting in on the act too.  C made the cheese and onion tear-and-share loaf you can see above.  We gave him the book from the most recent series of Great British Bake Off for his birthday, and he loves it.  So far we've had brandy snaps, hot chocolate fudge pudding and the bread from him.

All this sort of cooking tastes so good because it is made from a few simple ingredients, cooked slowly and with no stress on the part of the cook.  The smells fill the house with warmth and love.

Barbecued beans

We ate C's bread with this barbecued bean stew, which is a fantastic recipe for feeding a family very cheaply in a way which still seems luxurious.

Barbecued bean stew

  • 4 rashers smoked streaky bacon, snipped into pieces
  • 1 onion, sliced into half moons
  • 3 fat cloves of garlic, finely sliced
  • 1 stick of celery, chopped
  • 1 tin of chopped tomatoes, plus 1 tin of water
  • 1 bay leaf
  • 1 heaped tablespoon treacle or dark brown sugar
  • 2 tablespoons cider or wine vinegar
  • 1 tablespoon tomato ketchup
  • 1 tablespoon Worcestershire sauce
  • 1 tin of mixed beans in water
Slowly, gently, fry the onion, garlic, celery and bacon in a large casserole dish.  There is no need to add oil, as the bacon will provide enough fat.  Stir absently while listening to the radio.  When the veg is softenend, but not coloured, add all the rest of the ingredients apart from the beans.  Stir, put a lid on the pan and leave to bubble very gently on a low heat for about 30 minutes while you go off and do something more interesting.  Tip in the tin of beans - no need to drain or rinse first - if you've bought them in water it's all good stuff.  Simmer slowly for another 10 minutes with the lid off.

Serve with bread to mop up all the delicious, smoky, barbecue sauce.
 
 
I made these beans in my favourite orange shallow casserole dish from Le Creuset.  This is mostly because I like how the orange dish looks with the orange-brown barbecued beans.  But the beans would also work well if you made them in a slow cooker.
I am new to the world of slow cookers.  I have my friend Nina to thank for my introduction to this way of cooking because the other week she tweeted about coming home from work to a chicken and cider casserole cooked in her slow cooker and said it was 'as if somebody else had cooked dinner'.  That short sentence meant I just had to look into this more closely - how often have you come in at the end of the day and wished that for once someone else had cooked dinner?  A very beguiling idea indeed!

Slow cooker with chorizo & sweet potato stew

I bought this model - a whopper with 6 litres capacity.  The shallow amount you can see in the photo above was in fact a chorizo and sweet potato stew which fed five hungry people generously last night.

I am not a great fan of gadgets as I don't have much space in the kitchen, so anything I get is considered carefully and has to be used regularly to earn its place.  But Nina was right, this slow cooker is a great addition to my kitchen. 

I wondered how it would be different to sticking a casserole dish in a low oven for a few hours, which I've been doing for years. The big difference is that the slow cooker is safe to leave on overnight or when I go out, which makes it much more useful than an oven at a low temperature.  It also uses far less electricity than an oven, so is more economical.

Spices and herbs have a more intense flavour cooked this way, so I ease back a little on those but otherwise just stick to my usual stew and casserole recipes.  The only thing that has to be pre-cooked is mince, which clumps together if not fried in a pan first.  Other than that I don't pre-cook anything, just chuck it all in and switch it on.  This means it is simple enough to do first thing in the morning, before I even lay the table for breakfast.

Last weekend I roasted a whole chicken in it.  I made a bed of vegetables: celery sticks, carrots, a quartered onion, six cloves of garlic, a handful of peppercorns and a bay leaf.  I sat the chicken on top, poured in a glass of dry cider and 200ml of vegetable bouillon, and left it on for seven hours.  I came back home to find a beautifully bronzed chicken and half a litre of the most amazingly intense flavoured stock I have ever made.  The chicken and stock were used to make four separate and incredibly delicious meals during the week.

Tomorrow I have plans for a rabbit ragu.  C and I watched Jamie's Great Britain last week and this recipe had both of us shouting excitedly at the tele.  It looked so good, and we all like eating rabbit in this house.  Normally a rabbit from the local butcher costs about £7, but the only one he had left today was an absolute whopper which cost me £14, and will probably make enough bolognese sauce to feed us all until Christmas.  The rabbit and all the other ingredients will go into the slow cooker and we shall see what happens.  I predict great things.

Sunday, 6 November 2011

Amish baked oatmeal

I can't remember where I first came across this idea, but it captivated me right away. 

Amish baked oatmeal

Baked oats and fruit - a sort of solid, fruity, spicy porridge.  Eaten for breakfast, but with echoes of pudding.  All the recipes I found for it are American, and most refer to it as Amish oatmeal. So the recipe has an old fashioned, healthy German-Swiss heritage to it, which really appeals to me.

Amish baked oatmeal

Oats are mixed with eggs, milk, a little sugar and loads of fruit and then baked in a pie dish the oven.  My final recipe below is an amalgamation of loads of different ones I found online.  I reduced the sugar content to a fraction of the American versions, because I really don't like my food very sweet, and I upped the fruit content to compensate.

Amish baked oatmeal

The whole family adore this, and what should feed about six people disappears between the four of us in about ten minutes flat.  G, C and I like ours with natural yogurt on top and O likes hers plain.  Yesterday both G and O had third helpings.

All gone

Amish baked oatmeal

Dry ingredients:
  • 3 cups porridge oats
  • 1/2 cup brown sugar
  • 2 tsp baking powder
  • 2 tsp cinnamon or mixed spice 
  • 1 cup chopped fruit or berries (I used blueberries)
Wet ingredients:
  • 1 cup stewed fruit (I used apple)
  • 1 cup milk
  • 2 eggs
  • 2 tsp vanilla extract
  • 100g butter, melted or vegetable oil
Mix all the dry ingredients together in a big mixing bowl.  Stir all the wet ingredients together in a large jug.  Pour the wet into the dry and mix together until thoroughly combined.  Pour into a large pie dish and bake in the centre of the oven at Gas 4 for 50 minutes to 1 hour.  Check that it is done as you would for a cake: poke the middle with a cocktail stick and make sure that there is no wet mixture left.

This is so easy to make that you could mix it all up while you are half-asleep and then go back to bed with a cup of tea and the new copy of Mollie Makes while it cooks.  For instance.  The smell while it cooks will drive you crazy with desire, and eventually force you out of bed and downstairs so that you can eat great, greedy bowlfuls of it for breakfast, washed down with another cup of tea.

I mean really.  What's not to like about winter when you've got this to get you going in the morning?

Amish baked oatmeal

~~~~~~~~~~
This would be amazing with any combination of fruit.  I've seen many different permutations online:

  • stewed rhubarb and chopped apple, with ground ginger in place of the cinnamon
  • stewed blueberries and chopped peaches
  • stewed apple and mixed frozen berries (no need to defrost them first)
  • stewed plums and chopped apples
  • stewed apple and chopped pears
You get the picture.

Wednesday, 19 October 2011

I heart pies

I love pies with all my heart.  Pies make me happy.  There is no casserole or stew in the world that couldn't be improved with a lid of some sort.  I love crumbles, cobblers and crunchy breadcrumb toppings to pies, but a proper pie has a pastry top.  I think my love of pies might really be a love of pastry.

Most of the time I end up making two pies at once because I always make more pastry than I need for the main event.  I find it easier to have plenty of pastry and deal with leftovers than work with a parsimonious amount of pastry.

This morning I made C the giant mince pie he requested for his twelfth birthday tomorrow.  I used the orange-scented pastry that Nigella makes for mince pies in her Feast book - it has a very subtle orange flavour and is not too rich, but flakes beautifully.  I added a peeled and diced bramley apple to the giant jar of mincemeat I had (leftover from last Christmas - mincemeat keeps wonderfully, tucked away at the back of a dark shelf).  C loves apples, and a chopped apple stirred in made the mincemeat go further - you need a great deal of filling for a pie this big.

I decided not to go with a proper lid.  When I make small ones at Christmas I always top them with a star, and I thought stars would look rather nice on a birthday pie too.  I cut out the letters for C's name and added them to the stars to make it extra celebratory.

Cam's birthday mince pie
C's giant mince pie, for his 12th birthday

Because the stars on the top didn't use much pastry I had plenty left over.  Often I turn small amounts of leftover pastry into jam tarts (for sweet pastry) or cheese straws (for savoury pastry) but there was enough left today for a whole other pie.  I chopped up another couple of bramleys, tossed the pieces with brown sugar and allspice, and made an apple pie which we can have for tea tonight.  The apple pie was topped with a hedgehog just because I have a sweet hedgehog cutter from Ikea that I like using.

Apple pie with gratuitous hedgehog motif
Apple pie, with gratuitous hedgehog motif

So the birthday boy gets pie on birthday eve and pie on his birthday.  He likes pie too.

~~~~~~~~~~
Pie notes
  • I always brush the top of my pies with milk, not beaten egg.  This is because I can always think of better things to do with an egg than use it to glaze a pie (and have half a floury beaten egg left over - what a waste!).  Milk ends up giving a very similar burnished result, although admitedly a slightly less shiny one.
  • Get a silicone pastry brush.  For years I used a bristle one that looked lovely but left bristles over the tops of my pies.  Not a good look.
  • Mostly I use shortcrust pastry for pies, and I make it in my mixer.  I mix two parts strong white bread flour to one part fat (which is usually 50:50 butter and trex) then add liquid once the flour and fat look like breadcrumbs.  Liquid is usually water, but can be milk or egg.  For C's mince pie the liquid was orange juice.
  • Life's too short to get really het up over how neat a pie looks.  If it is patched and slightly raggedy it will still taste great.
  • If I'm making pasties rather than pies or tarts I use rough-puff pastry.  The best instructions I've found for rough-puff are in Hugh F-W's River Cottage Every Day book.
  • If you use metal pie and tart tins you never have to blind bake the pastry.
  • I am hoping that somebody who loves me might buy me this t-shirt for Christmas.
  • I currently have the Pieminister cookbook out of the library.  It is a glorious book with pies arranged according to season.  I've tried their curried chicken and squash pie recipe which was stunning. 
  • This Hairy Bikers' Perfect Pies book was out last week and is also on my reserve list at the library.  I have great hopes for it, as the pie recipes in their Mums Know Best books are already real favourites in our family.

    Pies
    Two pies for the birthday boy

    Thursday, 6 October 2011

    Old faithfuls

    I love trying new recipes, and I also love making old familiar recipes over and over again.  But something I've been very bad at trying is new versions of old favourite dishes.  It seems all wrong to go gallivanting around with new ideas when you've already got a recipe that is well loved, well tested and that you know by heart.

    And yet...whisper it...maybe there could be something even better than that old faithful recipe you've been making forever.

    So over the past month I have been RADICAL and DARING and tried out some new versions of old favourites.

    I had an early success with flapjacks: out went the recipe my Mum gave me when I left home (sorry Ma!) and in came the Peyton & Byrne version.  The Peyton & Byrne recipe has dried fruit in it, and a high butter to syrup ratio, making them less good for your arteries, but kinder on your teeth.  O, who doesn't normally like flapjacks, loved these ones.

    Then I decided to try a bigger challenge - meatloaf.  The recipe I've been baking since I was a teenager is one that a neighbour passed on to my Mum in the late 1970s.  My brother and I loved it as children, and my children now love it too.  It has hidden vegetables in it, succulent tender meat, and makes the whole house smell amazing while it bakes.  I felt very emotionally attached to my old recipe and thought that there was very little that could rival it.  But that recipe calls for both beef and pork, so when I only had beef but had already told my children and their friends that they were having meatloaf for tea, I had to look for another recipe.

    I went for the one in the second Hairy Bikers Mum Knows Best book.  I didn't think anything was going to come up to the standard of my inherited recipe, but this new one was a revelation - quicker to make, much less fatty without the additional pork, and just as tasty.  The four children demolished the lot and asked for more.

    And then I decided to mess around with that most sacred of old favourite recipes: fairy cakes.  I read somewhere a while back that if you swap half the quantity of flour for custard powder in your usual recipe then it makes for a more vanillary, creamy sponge  without altering the texture.  And today I tried it. 

    I made autumn buns to use up the last of the unrefined icing sugar I bought in a fit of worthiness a couple of months ago.  Unrefined icing sugar is not a good idea.  It makes a murky, caramel-coloured icing that does not mix well with food colouring.  But the shade of icing is vaguely autumnal so I added some autumn sprinkles and rather liked the end result.

    Autumn buns
    Autumn buns

    And the addition of custard powder to the recipe was agreed by all to be A Very Good Thing.  The buns were light and full of flavour.  There aren't many of them left.

    So what's next?  Is nothing sacred?  I still haven't found the nerve to mess around with my shortbread recipe, but perhaps I should.

    Wednesday, 21 September 2011

    Comfort amid the new and changing

    There is so much that is new happening in our family at the moment.

    Blue skies in East London
    Blue skies over East London this week

    C's new life at secondary school incorporates so many new experiences under just one heading.  He is walking to and from school each day rather than being driven or travelling with me on the tube.  He's doing several pieces of homework each night rather than just once a week.  He's making new friends, managing his own money and learning completely new subjects for the very first time.

    G is taking up new hobbies and resuming old ones, with the spare time he has now that he is no longer training for the ironman.  His work hours have changed significantly, as has his daily commute across London.

    I am starting new projects and using my time very differently to how I was a few months ago.  O finds herself in a busy whirl of birthday parties, ballet lessons, opticians appointments and new after-school arrangements.

    All of this, without exception, is good for us.  I am excited and energised by the new possibilities opening up for me, C loves his new school, G and O are busy and happy.  And yet...sometimes the newness and the bustle can still feel tiring and overwhelming, even though it's welcome and we're enjoying it.  Sometimes we just want to curl up under a quilt, watch favourite, missed TV shows on iPlayer and eat pudding.

    So I've stopped what I should be doing for the morning, and done some baking instead.  This bread pudding recipe, from my friend Nina, is the most comforting thing imaginable.  The children, G and I all rank it as one of our most favourite puddings ever.  It tastes wonderfully spicy and citrussy and completely hits the spot when you need a bit of comfort food.

    Bread pudding underway
    Stale bread, about to be transformed

    Bread pudding
    Butter, sugar, spices and fruit

    It is not a very beautiful pudding to look at, but just like your favourite pair of comfy slippers or your child's old, beloved bear-with-no-fur, it is not meant to be an object of great beauty.  Its power lies in the fact that it can lift your soul and bring you comfort and reassurance when everything feels a little bit new and challenging.

    Sink of suds
    Suds in the sink

    We're having our bread pudding for tea tonight, and then tomorrow we'll all be be back out there, embracing the newness once again.  That's the magic of this pudding.

    Sunday, 3 July 2011

    Nibbles and snacks

    Over the past month or two I have been gathering recipes and ideas for snacks and nibbles.  Little bites to stave off hunger - perfect for after school, around a campfire, with a chilled kir in the garden on a sunny evening, or any other time when supper is still a way off and you want something tasty to nibble on that isn't cake.

    I now have a good collection of favourites, and I try to make them on Friday evening and Sunday evening so that we've got a good supply for the weekend or week ahead.  Here's what I made this week.

    Honey and Soy Seeds

    This recipe is by Annabel Karmel, and I always make it for camping.  It is also great for packed lunches because it contains seeds, not nuts, so is permitted by schools with a no-nut policy.  Children go wild for it and eat it by the handful.

    • 1 tablespoon sunflower oil
    • 75g sunflower seeds
    • 75g pumpkin seeds
    • 1 tablespoon runny honey
    • 1 tablespoon soy sauce
    Heat the sunflower oil in a non stick frying pan.  Add the seeds and stir to toast them for a couple of minutes, or until they are lightly browned.  Remove the pan from the heat and add the soy sauce and honey.  It will sizzle like mad.  Stir for another minute and then leave to cool.  Store in an airtight container - will keep for up to a week, but there's no way they'll last that long!

    Seeds to nibble on

    Oatcakes

    This recipe is by Jill Dupleix, an Australian cook who used to be the Cookery Editor for The Times.  She writes beautifully simple recipes, packed with flavour, and this is the one of hers I make most often.

    • 120g oats
    • 100g plain flour
    • 80g butter
    • 1 teaspoon sea salt
    Put all the ingredients in a food processor and pulse until the mixture resembles breadcrumbs.  With the motor of the processor running, add cold water 1 tablespoon at a time until the mixture comes together in a big clump (about 2 to 4 tablespoons altogether).  Take the dough out and roll it on a floured surface until it is about 1cm thick.  Cut out into rounds with a biscuit cutter.  I use my smallest cutter which is 4cm across, but it is entirely up to you how big you want the oatcakes.

    Bake on a non-stick baking sheet at Gas 4 for 10 to 12 minutes.  Cool on a wire rack and store in an airtight container.

    I LOVE these served with a dab of cream cheese and some herbs or sundried tomatoes but the toppings are endless.  They are also delicious with:
    • hummous
    • slices of avocado
    • stinky blue cheese
    • little French cornichons
    • roasted tomatoes
    • little snippets of salami
    • aubergine dip

    Little stack of oatcakes

    Oatcake with cream cheese, pepper & basil

    Russian roulette popcorn

    • a large saucepan with a lid
    • 1 tablespoon of sunflower oil
    • popping corn
    • 1 tablespoon chilli oil
    • 1 tablespoon butter
    • 1 heaped teaspoon chilli flakes
    Make the popcorn by putting the sunflower oil and enough popping corn to just cover the base of your pan into the saucepan and heating over a medium heat with the lid on.  Shake the pan occasionally and after a few minutes you will hear the corn start to pop.  Keep the pan on the heat, still shaking it from time to time, until you can't hear any more popping.  Turn off the heat and tip the popcorn into a large bowl.

    Gently heat the chilli oil, butter and chilli flakes in a saucepan (I re-use the one I just made the popcorn in) until the butter is melted.  Tip slowly over the popcorn and stir everything around for a minute or two.

    This popcorn gets its name from the fact that you never quite know how much chilli - if any - you will get on each mouthful of popcorn.  The children love this excitement and dare each other to eat just one more mouthful. 

    If your family are not chilli lovers you can make a lovely rosemary version by keeping the butter but swapping the chilli oil and chilli flakes for olive oil and finely chopped fresh rosemary.  Will keep in a tin for a few days.

    Russian roulette popcorn

    What savoury snacks and nibbles do you like to make and eat?  I'd love to increase my collection of recipes!

    Tuesday, 28 June 2011

    Two good salads

    At this time of year, it is useful to have some salad recipes that don't involve lettuce (again) or couscous (again).  I am so bored with lettuce and couscous by the end of June.  I love tomato salads - tomatoes with mozzarella, or avocado, or cress, or capers, or basil...or pretty much anything.  But sadly, and annoyingly, neither of my children will entertain the idea of eating a fresh tomato. 

    They're missing out, but until I can persuade them otherwise I have to turn elsewhere for my non-lettuce and non-couscous salads.

    Two non-lettuce salads

    These two salads are the ones I make most often at this time of year.

    Sour Carrot Salad
    • 4 nice carrots
    • 1 large handful sunflower seeds
    • 1 large handful linseeds
    • 1 large handful sultanas
    • 2 tablespoons cider vinegar
    • 1 tablespoon rapeseed or olive oil
    Grate the carrots coarsly into a big bowl.  Put the sunflower seeds and linseeds into a dry frying pan over a medium heat and stir until toasted and the linseeds start popping.  Tip them into the bowl of carrots.  Add the sultanas, vinegar and oil to the bowl as well.  Mix well and serve.

    Carrot salad

    Broad bean, pea and mint salad
    • broad beans - about 20 pods or whatever you have
    • frozen peas - about a cereal bowl full
    • zest and juice of half a lemon
    • a slug of olive oil
    • a large handful of mint leaves, chopped
    Pod the broad beans, boil for about 4 minutes, cool under running water and pop the bitter skins off.  Tip into a nice serving dish, add the remaining ingredients, stir well and leave at room temperature for about an hour until the peas have defrosted and the flavours well mingled.

    Pea, mint & broad bean salad

    I like both these salads because they can be made well ahead of time.  The carrot salad travels particularly well and so is great for picnics or camping.

    They both use ingredients that I always have in the house (apart from broad beans, which are a seasonal treat, but actually the recipe still works well without them).  I buy linseeds at Waitrose, but I think most of the big supermarkets sell them too, and Holland & Barrett certainly do.

    Both the salads have strong flavours which really appeal to my children.  Now they are older they are far more likely to moan at bland flavours than strong ones, so I am exploiting this for all it's worth.  Tonight I chucked anchovies and loads of chilli into the pasta sauce and they both wolfed it down and asked for more.

    Monday, 27 June 2011

    Exuberant baking

    On Friday, O had a friend round after school.  They had baking plans.

    O:   "We'd like to make some buns."
    Me: "Okay - that's a good plan.  What sort of buns?"
    F:   "Nutella buns."
    Me: "Sounds good - plain buns with nutella inside?"
    O:   "No - chocolate buns with nutella inside!"
    F:   "And chocolate icing too!"
    O:  "Yes!  And sprinkles!"
    F:   "Lots of sprinkles."

    Well, why not?  Subtlety is not really where it's at when you're 8.

    Olivia and Florence's Extremely Chocolatey Chocolate and Nutella Buns, With Lots of Sprinkles
    • 175g self-raising flour
    • 115g butter or marg
    • 115g caster sugar
    • half teaspoon baking powder
    • 2 eggs
    • splash of milk
    • 2 heaped dessert spoons cocoa powder
    Put all the ingredients in a mixer or a large bowl and mix together thoroughly.  Put 18 paper cases into a bun tin and put a heaped teaspoon of mixture into each case.  Then put a teaspoon of nutella on top of each blob of mixture.  Finally put one more heaped teaspoon of bun mixture into each case.  Bake in the centre of the oven at Gas 5 for about 20 minutes.

    Nutella buns, waiting for chocolate buttercream to be piled on top

    For the icing, mix together:
    • 100g softened butter
    • 200g icing sugar
    • 2 heaped dessert spoons cocoa powder
    When the buns are completely cool, spread with the icing and decorate with lots of sprinkles.

    Livvy & Florence's nutella buns

    This recipe was easy enough for the girls to do by themselves, and involved enough to keep them occupied and absorbed for ages.  They made 24 buns with this mixture, by making them a bit smaller than usual and scraping out the bowl very thoroughly indeed. 

    They are the perfect small, sweet treat with a cup of espresso.  Thanks, girls!

    Monday, 6 June 2011

    Pancake skillet

    I've had a few comments and questions on the skillet, which is sitting over the campfire in one of my photos in the last post.  It is called a muurikka, and you can buy them at specialist camping or outdoor shops, including here. 

    Cath cooked us pancakes and bacon for breakfast on it.  You can see a video of her cooking pancakes, and get her pancake recipe, on her and Math's blog, here.

    After breakfast
    After the pancakes

    Tuesday, 17 May 2011

    Cookery book inspiration

    Current cookery book inspiration

    This is my current cookery book inspiration.  From top to bottom:
    I plan all the meals I am going to cook about a week ahead, and since 2005 I've been writing down my mealplans in notebooks rather than on scraps of paper.  I blogged briefly about them way back in 2007, here.  The collection of notebooks is now substantial, and already I love to look back and see which recipes are still putting in regular appearances, and which appeared for a few months and then fell out of favour.  Pasta pesto is still on the menu.
    Meal plan notebook

    Meal plan notebook

    I love cookery books and have three big shelves on a bookcase filled with them.  Each week I get a new stack of books down from the shelves and rifle through them to get some fresh ideas of what I should write down in my meal plan notebook.  I also get a great many cookery books out of the library, and if I find I still want to make recipes from a library book when it is time to return it, I go and buy myself a copy.

    Recent additions to my shelves via this route have been the brilliant River Cottage Bread Handbook and Harry Eastwood's Skinny French Kitchen. 
    .
    The bread handbook is exactly what you'd expect - a complete manual for everything you ever wanted to know about bread making, and crammed with fantastic recipes.  I now have two of the other River Cottage handbooks in this series reserved at the library.  I have a feeling they will all be awesome.

    The Skinny French Kitchen is already one of my most favourite cookbooks, and I've made so many recipes from it in the ten days I've had it.  I really enjoyed Harry Eastwood's first book - Red Velvet and Chocolate Heartache - and its quirky approach to cake baking, but the whimsical, sugary-sweet tone of the writing does get on my nerves a little after a while.  This second book just shines with genuine enthusiasm for her subject (classical French cookery) and is much less twee but just as clever.  The photography is outstanding, and worth the price of the book alone.  I'm fascinated to see what she does next.  Whatever it is, I'm sure I'll be buying a copy.

    The Tessa Kiros book - Apples for Jam - is from the library, and although I've cooked a couple of great recipes from it, I don't like it enough to buy it.  I find that all the childhood memoirs in the margins distract me from the recipes and clutter up the page.  Its a whopping tome of a family cookbook, and I already have enough of those on my shelves.

    Nigella's Kitchen and BBC Good Food are both old, faithful friends. I've been making spring rolls and tofu pancakes from this month's magazine, and the everyday brownies and the Korean keema from Kitchen.

    How do you find inspiration for what to cook?  Do you write out meal plans?  Do cookery books languish, unread, on your bookshelves or do you regularly consult them for ideas?  Do new cookery books have to work hard to earn a spot on your already crowded shelves?

      Friday, 21 January 2011

      Spiced raisin bread

      Okay - as requested, here is the recipe for spiced raisin bread!

      I usually make this dough in my bread machine and then transfer it to a loaf tin and leave it for a second rise before baking.  You could of course do the whole thing by hand or the whole thing in a bread machine.  More details on method follow below.

      Ingredients
      • 1/2 teaspoon dried yeast
      • 400g strong white bread flour
      • 1 tablespoon sugar
      • 1 tablespoon milk powder (optional)
      • 15g butter
      • 1 teaspoon salt
      • 2 heaped teaspoons mixed spice, allspice or cinnamon
      • 6 tablespoons raisins
      • 280ml water
      Method

      If you are using a bread machine, bung all the ingredients in, in the usual order (for my machine, it is yeast, then flour, then other dry ingredients, then water - but machines do vary).  Put on a dough setting, then remove and knead briefly.  Put into a 2lb loaf tin (see here for my thoughts on imperial sized tins!) and leave to rise. 

      If you are making by hand, combine the yeast with the water (from the hot tap), sugar, salt and milk powder.  Leave for 5 minutes to activate the yeast and then stir into the remaining ingredients with a wooden spoon.  Tip out onto a floured surface and knead until the dough is smooth and elastic.  Put the dough into an oiled bowl and leave to rise until doubled in size.  Knock back and transfer to a 2lb loaf tin for a second rise.

      Once the bread in the tin is risen, transfer to a hot oven (Gas mark 7) and bake for 35 minutes.  Tip onto a wire rack to cool.


      I love this bread toasted and spread with just butter.  O likes it with honey, and C favours it with apricot jam.  G will eat it with anything!  It makes awesome bread & butter pudding, and I have high hopes for the French toast from it tomorrow.  Enjoy!